Permissions
Bridge Admin Portal – Bridge Services LLC
Overview
Within the Bridge Admin Portal, permissions determine what each user can see and do. There are three scopes for permissions: Application, Project, and Organization. Each scope has its own set of roles that control access at different levels of the platform.
- Application roles govern global access across the entire Bridge platform (e.g., platform administrators who can manage tenants and system settings).
- Project roles control what a user can do within a specific project (e.g., project members vs. project leaders).
- Organization roles define permissions within an organization under a tenant (e.g., laborers, supervisors).
Below you’ll find instructions on how to create and manage roles in each scope, along with a dedicated section on creating a new role.
Application Roles
Application roles (sometimes called Tenant roles) determine what users can do across the entire Bridge application. Typical roles include “Leader” and “Member,” but you can create custom roles with tailored permissions.
Viewing Application Roles
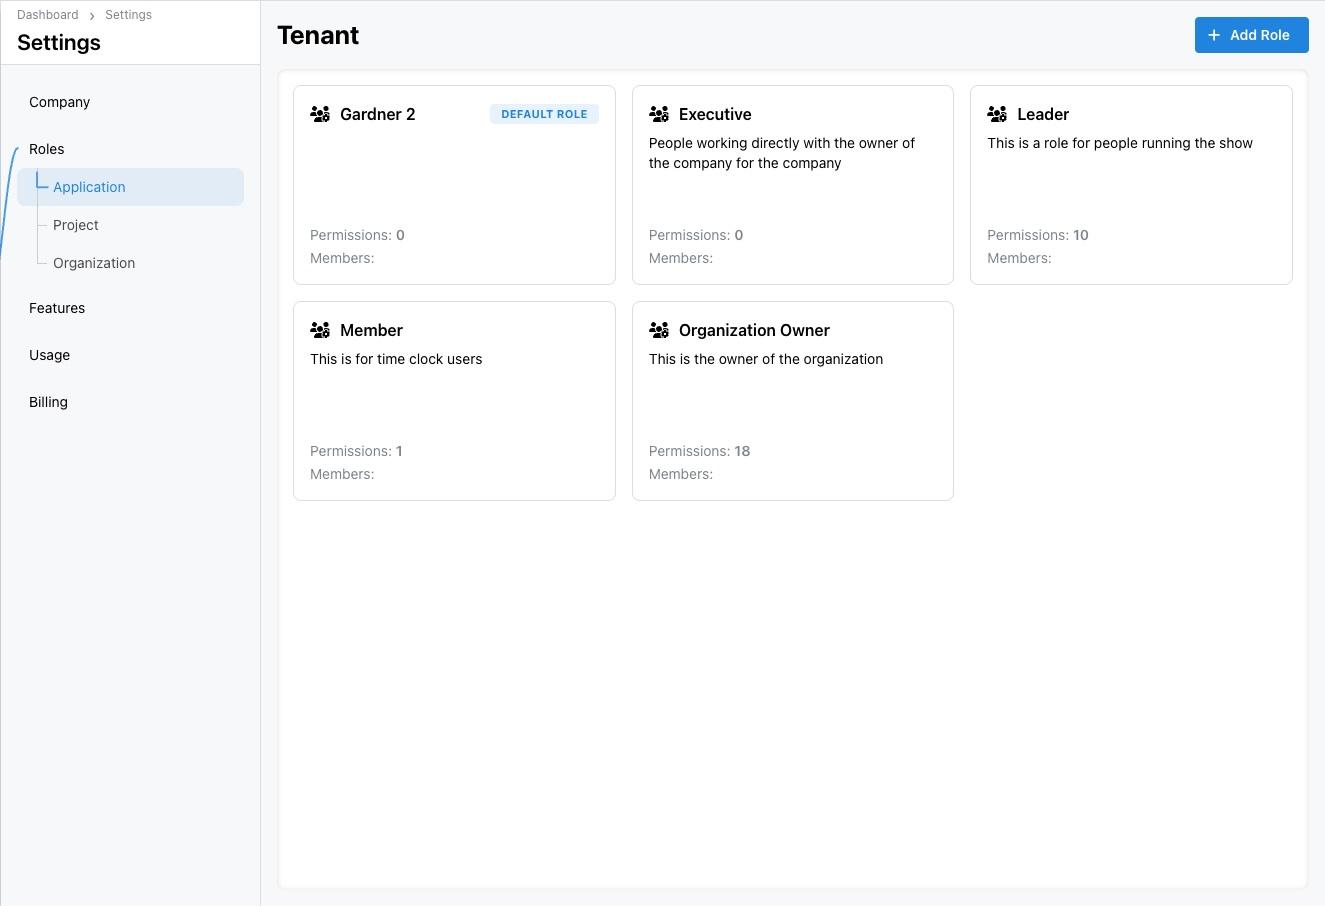
Example: In the screenshot below, the Gardner 2 (default) and Leader roles are visible under Application roles. The Add Role button at the top right is used to create a new application-wide role.

Creating an Application Role
- From the Application roles screen, click Add Role.
- In the Create role modal, choose Blank role (start from scratch) or Start from bundle (copy an existing role’s permissions).
- Enter a Role name (e.g., Supervisor) and an optional Description.
- If you want this to be the default role for new application users, check Make this the default role for new members.
- Click Create Role.
- After creating the role, you’ll be taken to a permissions editor where you can enable or disable specific capabilities (e.g., managing tenants, editing settings). Save your changes when finished.
- To assign users to the new role, go to People, edit the user, and select the new role from the Role drop‑down.
Project Roles
Project roles apply to individual projects. They let you control actions like viewing tasks, editing project details, or recording time entries. Default roles typically include Member and Leader, but you can create roles tailored to your workflows.
Viewing Project Roles
Example: In the Project roles screen, you’ll see roles like Member and Leaders. The default role is highlighted, and you can create additional roles via the Add Role button.

Creating a Project Role
- Go to Settings → Roles → Project and click Add Role.
- In the Create role modal, select Blank role or Start from bundle.
- Provide a Role name and description (e.g., Project Scheduler).
- Check Make this the default role if you want all new project members to receive this role by default.
- Click Create Role.
- The permissions editor will open. Enable project-specific permissions such as: - View project details - Edit tasks and milestones - Add or remove team members - Approve time entries
- Assign the role within a project: open a project via Projects, go to its Team section, and select the new role for each user.
Organization Roles
Organization roles determine permissions within an organization under a tenant (for example, a subcontractor or department). These roles govern what users can do across multiple projects belonging to the same organization.
Viewing Organization Roles
Go to Settings → Roles → Organization to see existing organization roles. The role cards display the role name, description, and counts of permissions and members.
Example: The Organization roles page shows existing roles, like Laborer, and lets you add new roles via the Add Role button.

Creating an Organization Role
Creating a New Role – General Process
Regardless of scope (Application, Project, or Organization), the process for creating a new role follows the same pattern. The modal shown below is the standard Create role form:
Steps:
- Open the Roles page for the desired scope (Application, Project, or Organization).
- Click Add Role.
- Choose a starting point: - Blank role – Start with no permissions and add only what you need. - Start from bundle – Clone an existing role’s permissions as a template.
- Name the role – Choose a clear and descriptive name that reflects the role’s purpose.
- Add a description (optional) – Provide context for team members on when to use this role.
- Set as default (optional) – If this role should automatically apply to new members within the scope, enable the default option.
- Click Create Role.
- Configure permissions – After creation, you’ll be directed to a page where you can toggle individual permissions. These may differ between scopes (e.g., project tasks vs. organization management).
- Assign users – Go to the relevant area (People, Project Team, or Organization) and assign the new role to users.
Best Practices
- Use descriptive role names so team members understand their purpose (e.g., “Project Scheduler” instead of “Custom Role 1”).
- Limit privileges: only assign users the permissions they need to perform their tasks. Start with a default role and add permissions as necessary.
- Review regularly: periodically audit roles and assignments to ensure permissions align with current responsibilities.
- Test new roles with a non‑critical user account to ensure the permissions work as expected before assigning them widely.
Last Updated: 2025‑11‑12 (Managed by Bridge Platform Administration Team)